
Hashnode Blogs on GitHub Profile

@hashnode provides an RSS feed out of all your activities on its platform. You can find it on <your-domain>/rss.xml. In this article, we're going to list all your published articles on your GitHub profile.
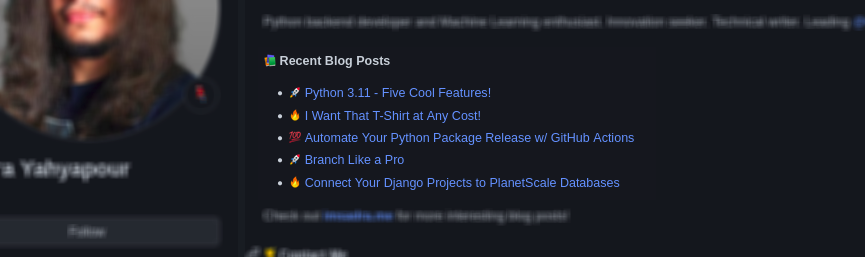
Here is a simple preview of what we're going to have at the end of this simple tutorial:
Prerequisites
- A GitHub account
- A Hashnode account
- A little bit of passion
Setup Time
Follow up these steps and make your GitHub profile synced with your Hashnode one!
1. Create the special repository
There is an easter-egg on GitHub where you can create a repository with the same name as your username. Whatever you write to its README.md file will appear on your profile page!
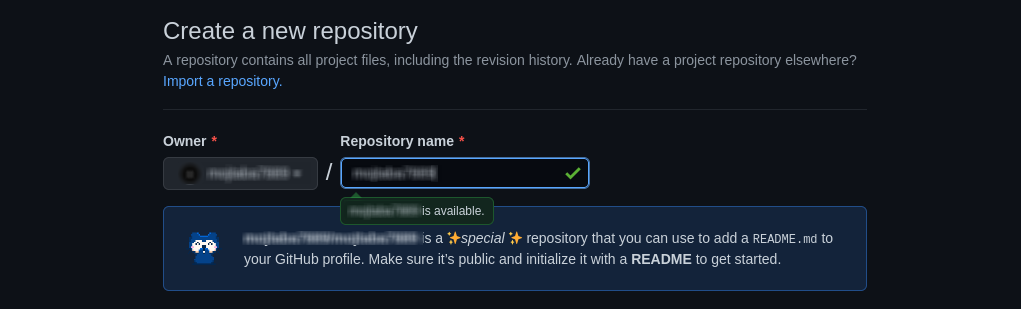
Don't forget to check the "Add a README file" box while creating the repository. Create the repository and you'll have a README view on your main profile page.
2. Add the pattern to README
Add the following snippet somewhere in your README.md file.
#### :books: Recent Blog Posts
<!-- BLOGPOSTS:START -->
<!-- BLOGPOSTS:END -->
That's how the application recognizes where it has to put the list.
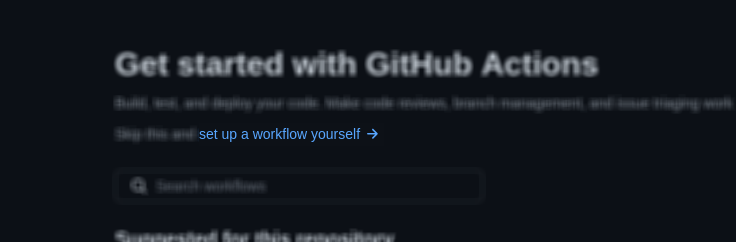
3. Create the action
Navigate to github.com/<your-username>/<your-username> and open up the "Actions" tab. Click "setup a workflow yourself" to create a new blank workflow.
4. Automate it
Paste the exact same workflow configuration you see down here. (It syncs every 6 hours of the day. You can change its schedule by changing the cron value)
name: Hashnode Blog Posts
on:
  schedule:
    # Runs every 6 hours of the day
    - cron: '0 */6 * * *'
  workflow_dispatch:

jobs:
  update-readme-with-blog:
    name: Update this repo's README with the latest blog posts
    runs-on: ubuntu-latest
    steps:
      - uses: actions/checkout@v2
      - uses: gautamkrishnar/blog-post-workflow@master
        with:
          comment_tag_name: "BLOGPOSTS"
          feed_list: "<link-to-your-rss>"
          template: "$newline - $randomEmoji(💯,🔥,💫,🚀,🌮) [$title]($url)"
          commit_message: "recent posts section updated"
          gh_token: ${{ secrets.GITHUB_TOKEN }}
Replace the feed_list value with <your-domain>/rss.xml. In my case, It's like this:
feed_list: "https://imsadra.me/rss.xml"
The cron part is related to the running schedule of your action. Create an appropriate pattern so then your README.md file will be synced based on that schedule.
You can create your proper cron patterns easier with Crontab Guru. Here are some samples you may need for your case though.
| Meaning | Pattern |
| Every day at 12:00 AM | 0 12 * * * |
| Every 6 hours | 0 */6 * * * |
| Every 1 hour | 0 * * * * |
| Every 30 minutes | 30 * * * * |
We're Almost Done!
To test the result, open up the "Actions" tab and run the workflow manually only this time. To do that, select the action we just created from the left-hand side and click the "Run workflow" drop-down. Finally, press the "Run workflow" green button.
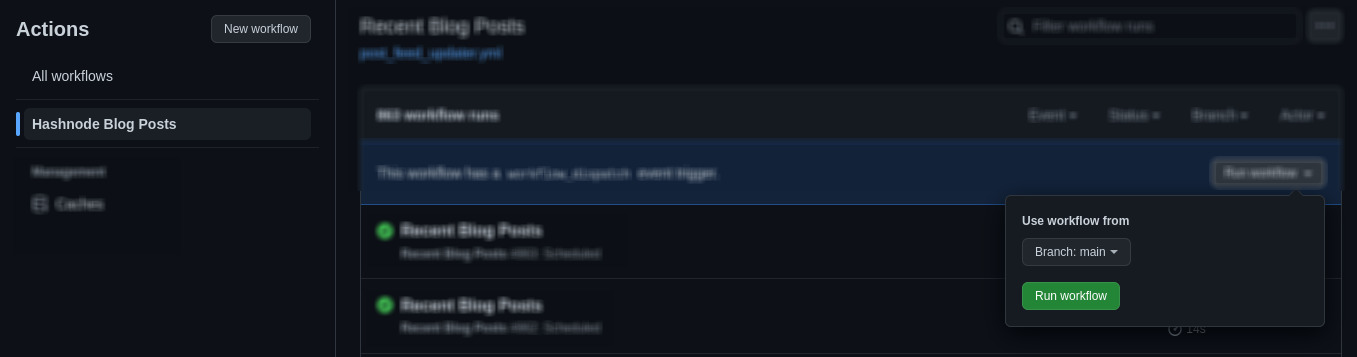
Wait a few seconds to get your workflow done. Once it's run successfully, head back to your GitHub profile and enjoy the result.
More Options
There are multiple configuration options you can apply for your workflow since we're using a third-party action. You're able to use emojis as your bullet lists, list the last X articles from the feed, sort the list, etc. You can find all options here.
My GitHub
Here is my GitHub account that uses the same technique we described in the article. Feel free to dive through the codes and projects. I'm so into open-source so you're always welcome to my profile!